Seattle based photographer specializing in aerial, landscape and abstract photography.
Tuesday, April 29, 2008
Monday, April 21, 2008
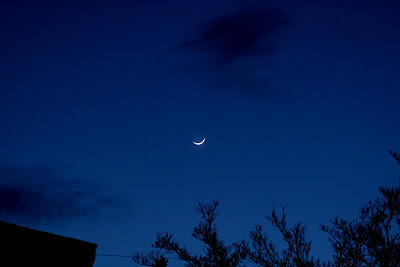
Black, Blue & Moon
Photography Articles and Reviews
Hello All and Welcome!
Here is a good resource of photography articles and camera reviews. I have pulled several posts out of a few articles in here. Feel free to read and post at your leisure.
Photography Articles, Reviews, and More
Here is a good resource of photography articles and camera reviews. I have pulled several posts out of a few articles in here. Feel free to read and post at your leisure.
Photography Articles, Reviews, and More
Tuesday, April 8, 2008
10 Photo Tips: In-Flight Photography
I think one of my favorite things to do in taking photos is to take them out the window of airplanes while on trips. You can get some wonderful shots of the sky, sun, ground, cities during the day and the moon and lights at night.
Here are a few tips to get some great shots out of those rare flights.
Tip #1 - Preparation
Reserve your seat in advance. Get the window seat. People tend not to like you leaning over them to get up against the window to take pictures. Also, try to be in front of the wing if at all possible. This will extend your photo range and reduce any air disturbances from the jet wash.
Tip #2 - Preparation
Have your camera out or easily available to you. If you have a small case for your DSLR or full size camera, think about taking that instead of a full case. It will fit under your seat easier and if needed pack extras in your main luggage.
Tip #3 - Preparation
Bring a small cloth, or napkin with you. Clean off the window as much as possible so you can reduce the spots (they usually aren't very clean). Also, turn out all the overhead lighting and/or bring a coat or jacket with you that you can use as a light shield to reduce any glare of the window.
Tip #4 - Photo Ops
Unfortunately, an airplane isn't standing still in the air. Remember to use a higher speed setting to reduce blur. (On my Canon Rebel XTi I generally use Tv 1/200 on ISO 800 or 1600). I generally stick with the shorter 18-55mm lens. A telephoto lens is difficult to handle in a small space, and is much harder to get stabilized, focused, and un-blurred shots.
Tip #5 - Photo Ops
Take-offs are great opportunities for photos of cities and closer to ground images. Have your camera ready to go for just after the plane takes off. (You can get some fun shots of airplanes while taxiing, and get your settings adjusted).
Tip #6 - Photo Ops
Just after take-off, if it is a cloudy day, wait for the airplane to break through the cloud layer. If its a morning or evening flight you can usually get some really good sunrise or sunset photos.
Tip #7 - Photo Ops
Take lots of photos or use the continuous shot feature on your camera. Most shots are close to a once in a lifetime opportunity that you wont be able to replicate later. (This is easier with digital cameras, just delete them later when you're on the ground.) You will have a better chance to get a clean shot when you can pick the best of 3 (or 5).
Tip #8 - Night Photo Ops
Night and dark photos are especially tricky. More so when you add in movement and vibration. It definitely helps if you have a steady hand (no room for a tripod, but a small monopod might help.) Play with extending your exposure time and lower the ISO to 100 or 200, if not lower. If your photo is a little dark, remember you can probably lighten it up in Photoshop later. This will help to get smaller details cleaner.
Tip #9 - Night Photo Ops
Night shots can be very rewarding. Sunsets can create beautiful vibrant colors and lighting features that you can capture. The moon as well can cast an immense amount of light on clouds if it's after sunset. The moon and stars are even brighter when flying at 30,000' as you are above a lot of atmosphere that you would normally have to shoot through. Big cities are great at night with all the lights.
Tip #10 - Safety
Taking photographs in a commercial airline is a very cramped business. Try not to bother the person sitting next to you (maybe even let them look outside once in a while). Be careful with your equipment, there isn't a lot of room available for storage under the seat in front of you (don't kick the camera). If you are taking pictures out the window, remember turbulence can happen. Don't let your camera hit the window, or your face, if a sudden jolt hits (leave your body semi-loose and flexible - be a human shock absorber).
Remember, have fun with your shots. I certainly don't get to fly enough and I like to take every opportunity I can when I do to get great photos.
Some of my flight shots:

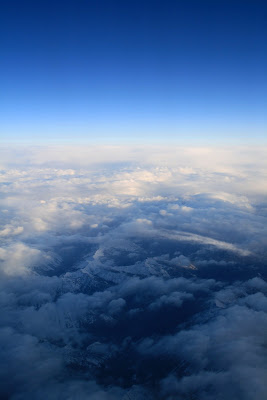
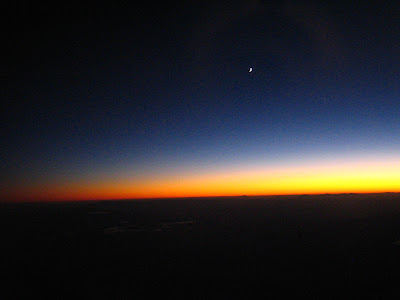
Day-Night Border over Cascade Mountains

Sunrise over Seattle

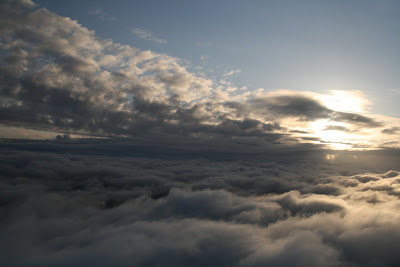
Sunrise over Seattle Weather

Fire Night (One of my favorites)

Moon Over Hole

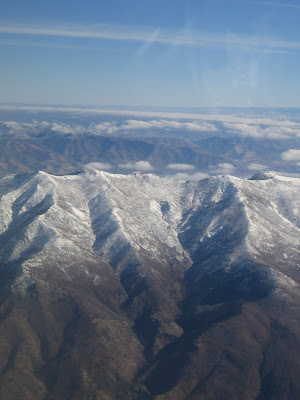
Rocky Mountains, Montana

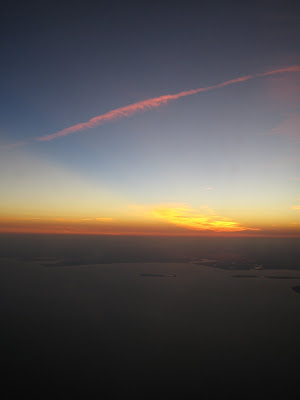
Sunset over Houston, TX
I think one of my favorite things to do in taking photos is to take them out the window of airplanes while on trips. You can get some wonderful shots of the sky, sun, ground, cities during the day and the moon and lights at night.
Here are a few tips to get some great shots out of those rare flights.
Tip #1 - Preparation
Reserve your seat in advance. Get the window seat. People tend not to like you leaning over them to get up against the window to take pictures. Also, try to be in front of the wing if at all possible. This will extend your photo range and reduce any air disturbances from the jet wash.
Tip #2 - Preparation
Have your camera out or easily available to you. If you have a small case for your DSLR or full size camera, think about taking that instead of a full case. It will fit under your seat easier and if needed pack extras in your main luggage.
Tip #3 - Preparation
Bring a small cloth, or napkin with you. Clean off the window as much as possible so you can reduce the spots (they usually aren't very clean). Also, turn out all the overhead lighting and/or bring a coat or jacket with you that you can use as a light shield to reduce any glare of the window.
Tip #4 - Photo Ops
Unfortunately, an airplane isn't standing still in the air. Remember to use a higher speed setting to reduce blur. (On my Canon Rebel XTi I generally use Tv 1/200 on ISO 800 or 1600). I generally stick with the shorter 18-55mm lens. A telephoto lens is difficult to handle in a small space, and is much harder to get stabilized, focused, and un-blurred shots.
Tip #5 - Photo Ops
Take-offs are great opportunities for photos of cities and closer to ground images. Have your camera ready to go for just after the plane takes off. (You can get some fun shots of airplanes while taxiing, and get your settings adjusted).
Tip #6 - Photo Ops
Just after take-off, if it is a cloudy day, wait for the airplane to break through the cloud layer. If its a morning or evening flight you can usually get some really good sunrise or sunset photos.
Tip #7 - Photo Ops
Take lots of photos or use the continuous shot feature on your camera. Most shots are close to a once in a lifetime opportunity that you wont be able to replicate later. (This is easier with digital cameras, just delete them later when you're on the ground.) You will have a better chance to get a clean shot when you can pick the best of 3 (or 5).
Tip #8 - Night Photo Ops
Night and dark photos are especially tricky. More so when you add in movement and vibration. It definitely helps if you have a steady hand (no room for a tripod, but a small monopod might help.) Play with extending your exposure time and lower the ISO to 100 or 200, if not lower. If your photo is a little dark, remember you can probably lighten it up in Photoshop later. This will help to get smaller details cleaner.
Tip #9 - Night Photo Ops
Night shots can be very rewarding. Sunsets can create beautiful vibrant colors and lighting features that you can capture. The moon as well can cast an immense amount of light on clouds if it's after sunset. The moon and stars are even brighter when flying at 30,000' as you are above a lot of atmosphere that you would normally have to shoot through. Big cities are great at night with all the lights.
Tip #10 - Safety
Taking photographs in a commercial airline is a very cramped business. Try not to bother the person sitting next to you (maybe even let them look outside once in a while). Be careful with your equipment, there isn't a lot of room available for storage under the seat in front of you (don't kick the camera). If you are taking pictures out the window, remember turbulence can happen. Don't let your camera hit the window, or your face, if a sudden jolt hits (leave your body semi-loose and flexible - be a human shock absorber).
Remember, have fun with your shots. I certainly don't get to fly enough and I like to take every opportunity I can when I do to get great photos.
Some of my flight shots:

Day-Night Border over Cascade Mountains

Sunrise over Seattle

Sunrise over Seattle Weather
Fire Night (One of my favorites)
Moon Over Hole
Rocky Mountains, Montana
Sunset over Houston, TX
Labels:
Airplane Photos,
Night Photo,
Photo Tips,
Photography,
Photography Tips,
Photos,
Scenery,
Sky Photo
Tuesday, March 25, 2008
Dry Roses & Crystal Shadow
Here is an application of the previous post about how to take pictures of flowers.
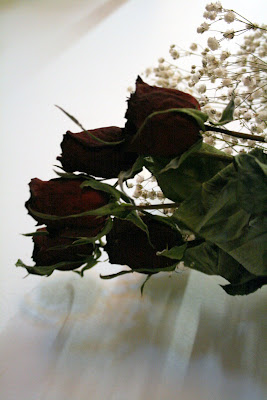
This is a photo of some dried Valentine's roses but the twist is their shadow is diffused because the light source is coming from a reflection off crystal.
Monday, March 17, 2008
How to Photograph Flowers
HOW TO PHOTOGRAPH FLOWERS
When you photograph flowers, you have to make a couple of important decisions.
As with any photograph, your first decision is to decide: What's my subject? Is it a bouquet of flowers, or the macro view of a stamen? A single flower closeup? A bed of hundreds of flowers? A field of thousands?
From this decision will flow many specifics of the picture you want to take and how to go about it.
Macros - Let's start with the macro photo — that is, with extreme closeups. Of course, you can only take this type of picture if your lens has a macro mode. This rules out most film point-and-shoot cameras that can't focus closer than two or three feet. With a macro, you're focusing from a few inches!
When you take a macro photo, focus is all-important. Your plane of focus is very shallow — just a fraction of an inch. So you have to make another decision: Exactly what part of the flower do you want to be in sharp focus? The pistil? The stamen? A petal? (We've run out of high-school biology terminology, but you get the idea.) Unless you're a botanist, you will probably make this decision "on the fly" — that is, as you look through the viewfinder. When you see the image that you want, press the shutter!
While it is possible to take a good close-up photo handheld, our advice is to use a tripod if at all possible. Particularly if the flower is swaying in the wind, changing the focal point every moment, you're better off not adding the additional confusion of a swaying camera too. Use a tripod and be patient. Most often, the wind will die down from time to time and the flower will stand still and "pose" for an instant. That's the instant to shoot!
Tip - Windy conditions? Try using a sheet of cardboard to protect your target from the wind. Becareful of it's effect on lighting conditions however.
Shot of a Single Flower Head - Much of what we said for the macro view applies here too. As before, you can't get close enough for this type of picture with film point-and-shoot cameras. Once again, you'll be better off using a tripod if possible. Remember also that you don’t have to make pictures of single flowers while you’re bent over in the garden. Over the years many great photographers have made wonderful still life studies of flowers in a studio setting where there’s no wind and the photographer has precise control over the lighting. Whether you’re taking pictures indoors or out, once again exposure will be more precise if you use a gray card or take an incident reading. And the picture will often be improved if you can add a crawling critter.
Good focus is still important, but it's not so critical as it was with the macro. The zone of good focus is now a few inches, not just a fraction of an inch. So, while you still want to focus well, you don't need to watch focus quite so critically.
An added decision for you to make with this type of shot is to consider the direction of light. It's possible to take a very attractive picture with the light in its "usual" position, streaming from behind you toward the flower. But give strong consideration to backlighting — that is — light coming from behind the flower, toward the camera. Since flower petals are usually translucent, backlighting can give them an iridescent glow that accentuates the flower's color and brings it to life.
Bigger Floral Subjects - What about a bed of flowers...or a field of them? Here, you can probably use a point-and-shoot as well as an SLR. A tripod is less necessary. Focus is no longer critical — it can extend for feet or even miles. And metering with your built-in meter will probably produce a good result.
What about the direction of light? It still can make a difference. If you can check how the flowers look from different sides, by all means do so. Frontlighting may be all right. Backlighting — or sidelighting — may be better. Camera angle — that is, height — is usually less important in this type of long shot. (You should still stoop down to see if the image is improved from a low angle that will accentuate the nearest flowers.)
What should you look out for here? We think you should go back to the very first decision: What's your subject? A bed or field of flowers may look exquisite to your eye, but often makes an awfully dull picture. Look for something that will add interest to the picture. Something else that will draw the eye of the viewer and be the subject of your picture, with the flowers acting as swatches of color that complement it.
If you're photographing a flower bed, look around. Perhaps, a child playing amidst the flowers will make a far more interesting picture. Or the house behind it. Or the apple tree in the foreground? Or the fence in the background. Or anything else you can find to draw the viewer's eye and add interest.
Do the same with a field of flowers. Is there a barn that would make a better subject? A tree? A windmill? A lone person far out in the field. A babbling stream? A majestic mountain landscape?
To sum all this up: Flowers are colorful and can make beautiful subjects when you're close up and they fill the frame. You're better off finding another subject, and using the flowers as an "accessory," when you're shooting from farther away.
- Summary and Excerpts from the New York Institute of Photograph, HOW TO PHOTOGRAPH FLOWERS - PART 1 article

When you photograph flowers, you have to make a couple of important decisions.
As with any photograph, your first decision is to decide: What's my subject? Is it a bouquet of flowers, or the macro view of a stamen? A single flower closeup? A bed of hundreds of flowers? A field of thousands?
From this decision will flow many specifics of the picture you want to take and how to go about it.
Macros - Let's start with the macro photo — that is, with extreme closeups. Of course, you can only take this type of picture if your lens has a macro mode. This rules out most film point-and-shoot cameras that can't focus closer than two or three feet. With a macro, you're focusing from a few inches!
When you take a macro photo, focus is all-important. Your plane of focus is very shallow — just a fraction of an inch. So you have to make another decision: Exactly what part of the flower do you want to be in sharp focus? The pistil? The stamen? A petal? (We've run out of high-school biology terminology, but you get the idea.) Unless you're a botanist, you will probably make this decision "on the fly" — that is, as you look through the viewfinder. When you see the image that you want, press the shutter!
While it is possible to take a good close-up photo handheld, our advice is to use a tripod if at all possible. Particularly if the flower is swaying in the wind, changing the focal point every moment, you're better off not adding the additional confusion of a swaying camera too. Use a tripod and be patient. Most often, the wind will die down from time to time and the flower will stand still and "pose" for an instant. That's the instant to shoot!
Tip - Windy conditions? Try using a sheet of cardboard to protect your target from the wind. Becareful of it's effect on lighting conditions however.
Shot of a Single Flower Head - Much of what we said for the macro view applies here too. As before, you can't get close enough for this type of picture with film point-and-shoot cameras. Once again, you'll be better off using a tripod if possible. Remember also that you don’t have to make pictures of single flowers while you’re bent over in the garden. Over the years many great photographers have made wonderful still life studies of flowers in a studio setting where there’s no wind and the photographer has precise control over the lighting. Whether you’re taking pictures indoors or out, once again exposure will be more precise if you use a gray card or take an incident reading. And the picture will often be improved if you can add a crawling critter.
Good focus is still important, but it's not so critical as it was with the macro. The zone of good focus is now a few inches, not just a fraction of an inch. So, while you still want to focus well, you don't need to watch focus quite so critically.
An added decision for you to make with this type of shot is to consider the direction of light. It's possible to take a very attractive picture with the light in its "usual" position, streaming from behind you toward the flower. But give strong consideration to backlighting — that is — light coming from behind the flower, toward the camera. Since flower petals are usually translucent, backlighting can give them an iridescent glow that accentuates the flower's color and brings it to life.
Bigger Floral Subjects - What about a bed of flowers...or a field of them? Here, you can probably use a point-and-shoot as well as an SLR. A tripod is less necessary. Focus is no longer critical — it can extend for feet or even miles. And metering with your built-in meter will probably produce a good result.
What about the direction of light? It still can make a difference. If you can check how the flowers look from different sides, by all means do so. Frontlighting may be all right. Backlighting — or sidelighting — may be better. Camera angle — that is, height — is usually less important in this type of long shot. (You should still stoop down to see if the image is improved from a low angle that will accentuate the nearest flowers.)
What should you look out for here? We think you should go back to the very first decision: What's your subject? A bed or field of flowers may look exquisite to your eye, but often makes an awfully dull picture. Look for something that will add interest to the picture. Something else that will draw the eye of the viewer and be the subject of your picture, with the flowers acting as swatches of color that complement it.
If you're photographing a flower bed, look around. Perhaps, a child playing amidst the flowers will make a far more interesting picture. Or the house behind it. Or the apple tree in the foreground? Or the fence in the background. Or anything else you can find to draw the viewer's eye and add interest.
Do the same with a field of flowers. Is there a barn that would make a better subject? A tree? A windmill? A lone person far out in the field. A babbling stream? A majestic mountain landscape?
To sum all this up: Flowers are colorful and can make beautiful subjects when you're close up and they fill the frame. You're better off finding another subject, and using the flowers as an "accessory," when you're shooting from farther away.
- Summary and Excerpts from the New York Institute of Photograph, HOW TO PHOTOGRAPH FLOWERS - PART 1 article
Thursday, March 13, 2008
Out to Lunch
As often I get to use my camera, I don't have enough time in the day to manage my photos or post new ones to my photography blog. I have been working on other projects that have taken up the majority of my time, like my World War II History site and WWII History blog.
This has basically eaten up all my photoshopping and posting time. However I have been collecting historical WWII photos and images into a database, so my photo work goes on, even if slightly redirected by about -60 years.
Subscribe to:
Posts (Atom)